

How to Change Nat Type Without Access to Router Pc
Quick Assist offers you a fast and easy way to connect to a remote PC to view or troubleshoot a problem.

Image: Microsoft
You can connect to a remote PC using a variety of different tools, but sometimes you might need to access another PC in order to view or troubleshoot a problem. In that case, you can turn to a built-in Windows 10 tool called Quick Assist.
Through Quick Assist, which requires permission from a person at the remote PC, you can opt to either view the screen or take full control of the computer. After you're connected, you can work on the PC to troubleshoot the technical issue. Using the controls in Quick Assist, you can change the screen size of the remote session, chat with the person on the other end, draw on the screen, and even pause and restart the remote session.
SEE: Windows 10 security: A guide for business leaders (TechRepublic Premium)
Let's say you want to connect to another person's PC. Ask that person to launch Quick Assist on their computer. To do so, they would click on the Start button, go to Windows Accessories, and select the shortcut for Quick Assist. At the same time, open Quick Assist on your computer using the same steps. At the Quick Assist window on your computer, click the button to Assist another person (Figure A).
Figure A

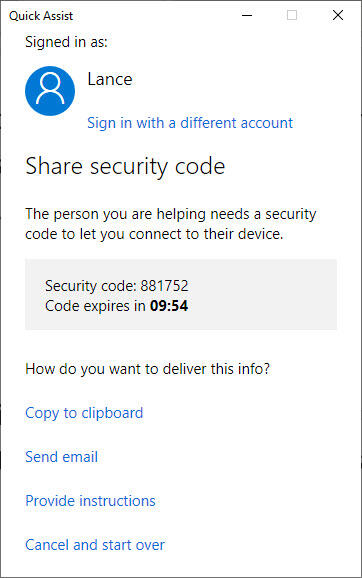
If prompted, sign in with your Windows account. Look for the security code that appears in the Quick Assist window. Note the countdown that indicates how long the code will be valid (Figure B).
Figure B
Give the other person the security code. You can send the code by copying it to the clipboard and then transferring it via text message or another method. You can email the code. Or, you can give the code to the other person by phone, which may be the easiest and most secure way to convey it. That person then enters the code on their end via the field that says Code From Assistant and then clicks the button to Share Screen (Figure C).
Figure C

On your end, the Quick Assist window asks if you want take full control of the computer or just view the screen. Taking full control of the computer means you can work with it using your mouse and keyboard. Just viewing the screen means that the user maintains control of the PC while you can peek around as they show you a specific screen, program, or action. With either option, you share the computer with the other person, so they can continue to control it if necessary. Make your choice and then click Continue (Figure D).
Figure D

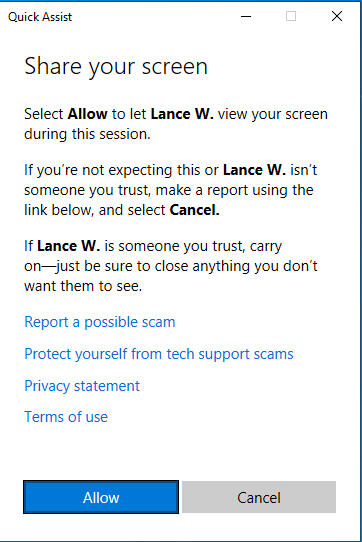
The remote user then views the Share Your Screen window that displays your name as confirmation. They then click the Allow button (Figure E).
Figure E
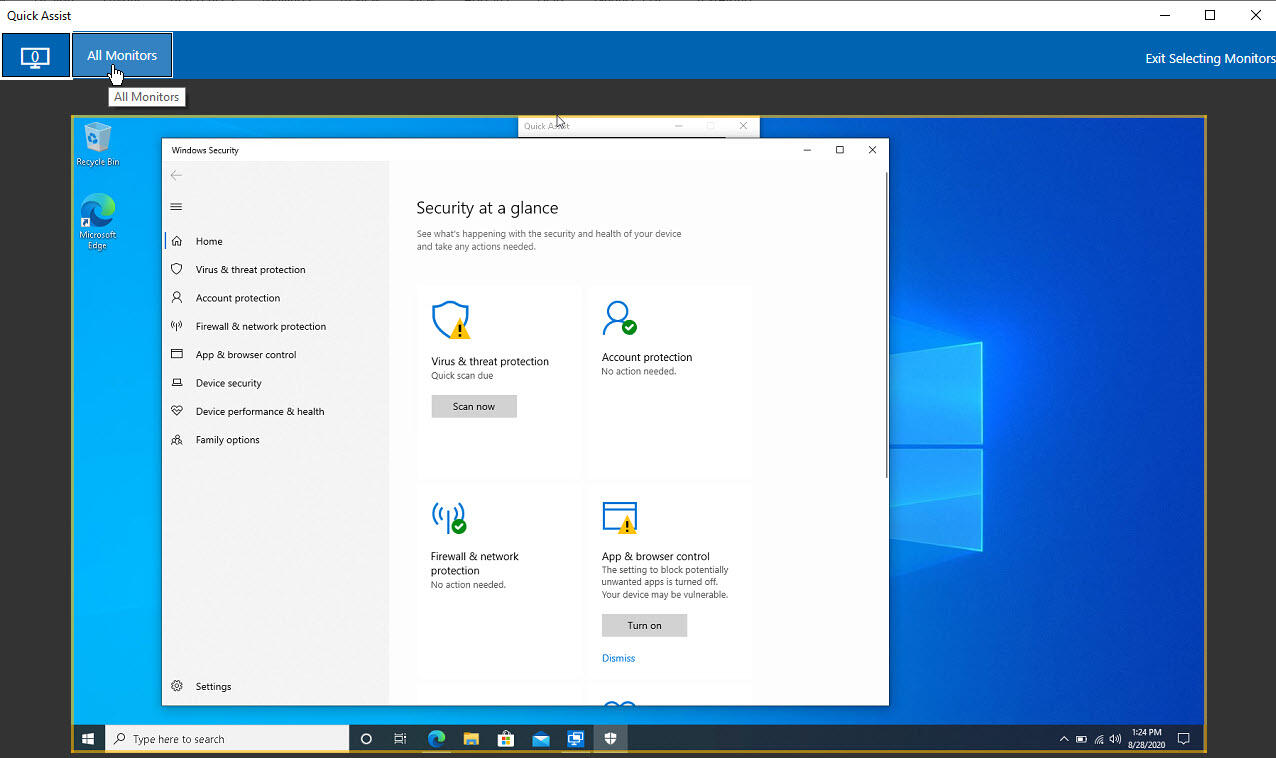
You now can view, or view and control the remote PC, depending on which option you chose. You can also investigate and try to resolve the technical issue on that PC. As you're viewing or controlling the computer, Quick Assist offers a few options via the top toolbar. Click the ellipsis icon at the end to display the names of each icon in the toolbar (Figure F).
Figure F

The icon for Select Monitor lets you select a specific monitor if the remote PC is using multiple monitors (Figure G).
Figure G
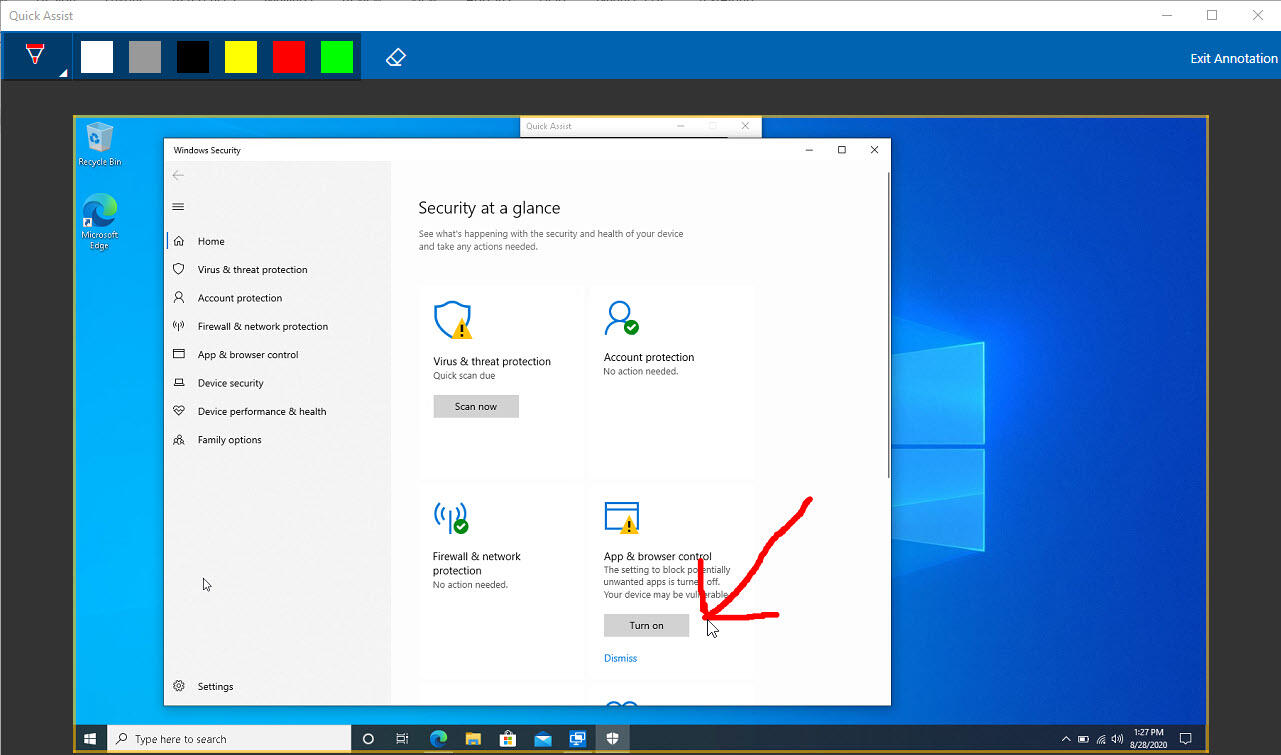
The icon for Annotate lets you draw on the screen. Click the Pen icon to select a specific color. Click the Erase icon to erase what you just drew (Figure H).
Figure H
The icon for Actual Size lets you view the screen of the remote PC in its actual size, which should be larger than the default option of Fit Screen (Figure I). You can also resize the Quick Assist window to see more or less of the remote PC.
Figure I

The icon for Toggle Instruction Channel provides a chat tool through which you can send directions to the person at the remote PC (Figure J). The person on the other end would click the icon for Toggle Instruction Channel to read and respond to your message.
Figure J

The icon for Restart reboots the remote PC. You would then click the Restart button and then the Restart Now button. The connection is reestablished after the remote computer restarts (Figure K).
Figure K

The icon for Task Manager displays the Task Manager tool on the remote PC (Figure L).
Figure L

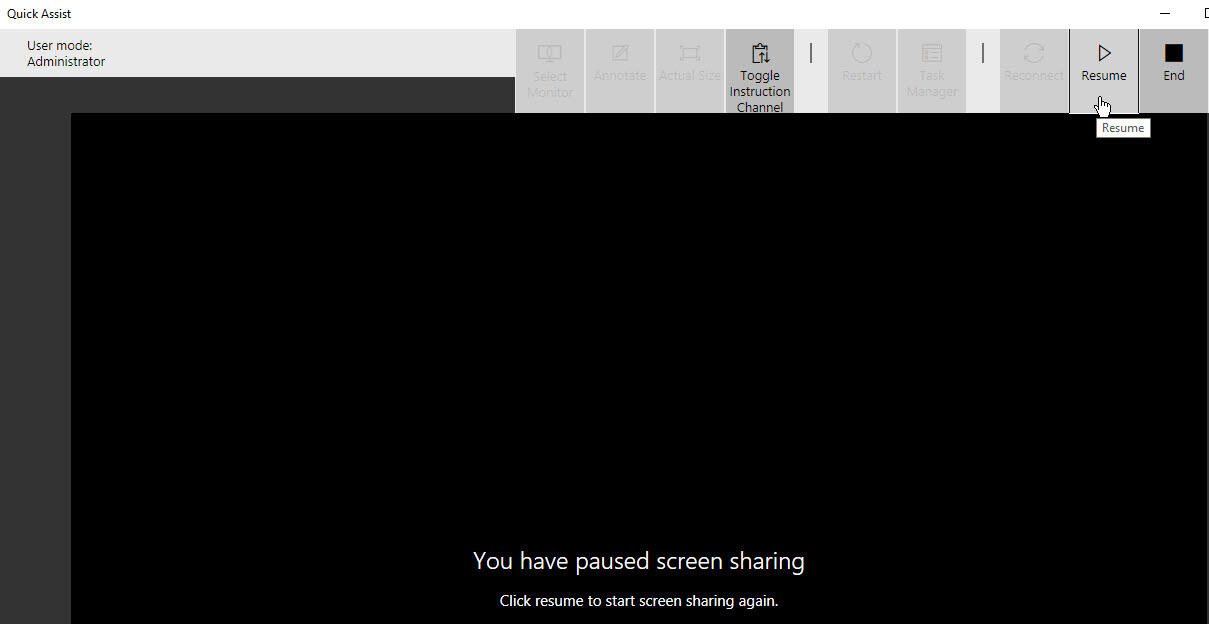
The icon for Pause lets you pause the remote connection in case the person on the other end needs to do something you shouldn't see, such as entering a password. You would then click the Resume icon (Figure M).
Figure M
The End icon lets you end the remote connection. If you wish to reestablish it, click the Reconnect icon (Figure N).
Figure N

When finished, each of you would close the Quick Assist window. Launching another Quick Assist session would then require a new code and new permission.

Microsoft Weekly Newsletter
Be your company's Microsoft insider by reading these Windows and Office tips, tricks, and cheat sheets. Delivered Mondays and Wednesdays
Sign up todayAlso see
- How to become a software engineer: A cheat sheet (TechRepublic)
- Zoom vs. Microsoft Teams, Google Meet, Cisco WebEx and Skype: Choosing the right video-conferencing apps for you (free PDF) (TechRepublic)
- Hiring Kit: Application engineer (TechRepublic Premium)
- Microsoft 365 (formerly Office 365) for business: Everything you need to know (ZDNet)
- The 10 most important iPhone apps of all time (Download.com)
- It takes work to keep your data private online. These apps can help (CNET)
- Must-read coverage: Programming languages and developer career resources (TechRepublic on Flipboard)
How to Change Nat Type Without Access to Router Pc
Source: https://www.techrepublic.com/article/how-to-access-a-remote-pc-with-windows-10-quick-assist/
0 Response to "How to Change Nat Type Without Access to Router Pc"
Post a Comment